

Proportion of a CITY CAR
The purpose of this tutrial is to give you an idea of how to best start a new project in the world ofautomotive design. Both beginners, students and even professionals feel the same difficulties whendrawing a car type that they have never drawn before.
The purpose of this tutorial is to give you an idea of how to best start a new project in the world of automotive design. Beginners, students, and even professionals alike experience the same difficulties when drawing a car type that they have never drawn before.
Before starting a project, it is very helpful to know the basic proportions and hardpoints of the object. Familiarize yourself with the package and proportions first.
This example should encourage you to analyze the basic proportions of different vehicle types.

Always focus on the side view first. The side view contains all the necessary information you need to draw a car. After internalizing the basic proportions, it will be easier for you to get results since the basic architecture is correct.
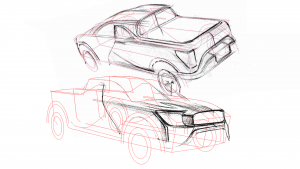
For the purpose of this tutorial, let’s assume you need to design a city car. In the first picture below, you see the same car but with different proportions. Their overhang, wheel size, and cabin-to-body ratios are different.
The car can be built or designed like these. Nevertheless, between the two designs, the upper one is more convincing. This is mainly due to the cabin-to-body ratio. To avoid the mistake made in the second design and prevent other errors, take a close look at the proportions.
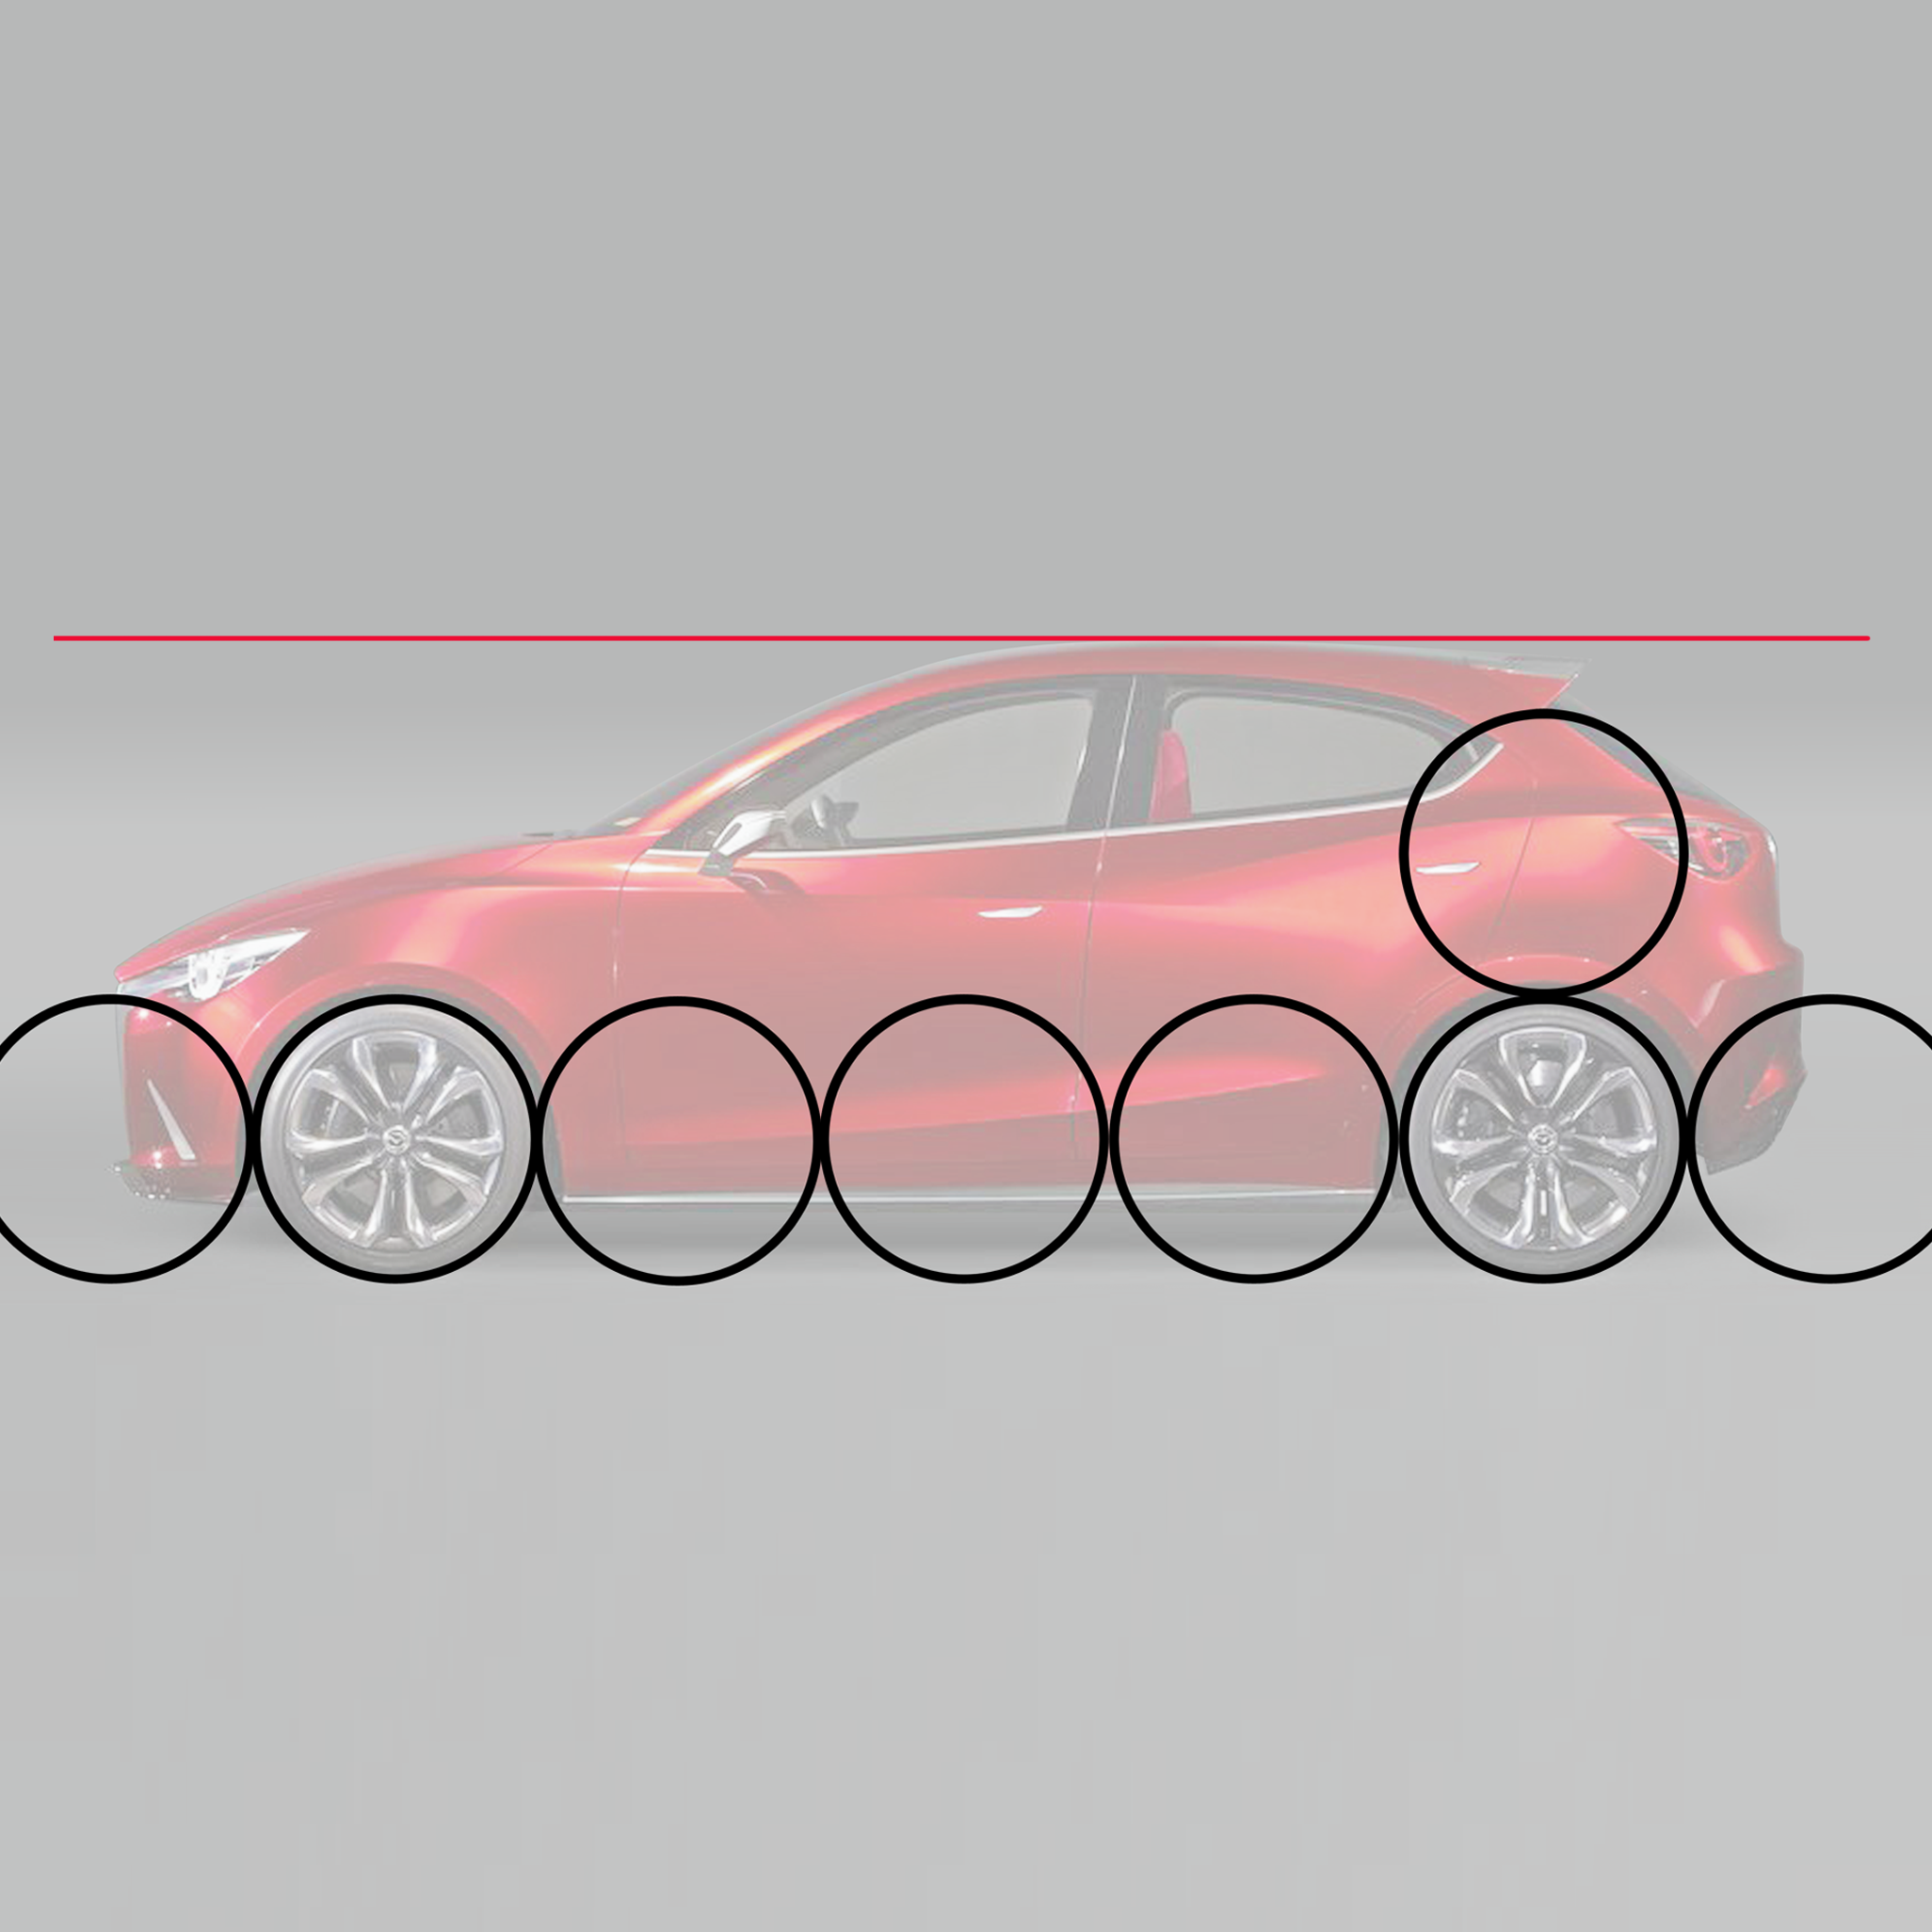
First, try to find out the length and height of the car. To find the correct wheelbase, it helps to take one wheel as a base unit. Now you can guess how many wheels fit between the front and rear axle.
Also, you can see that the overhang of the front and rear is about half a wheel. The rear is a bit shorter. The height is slightly more than one wheel.
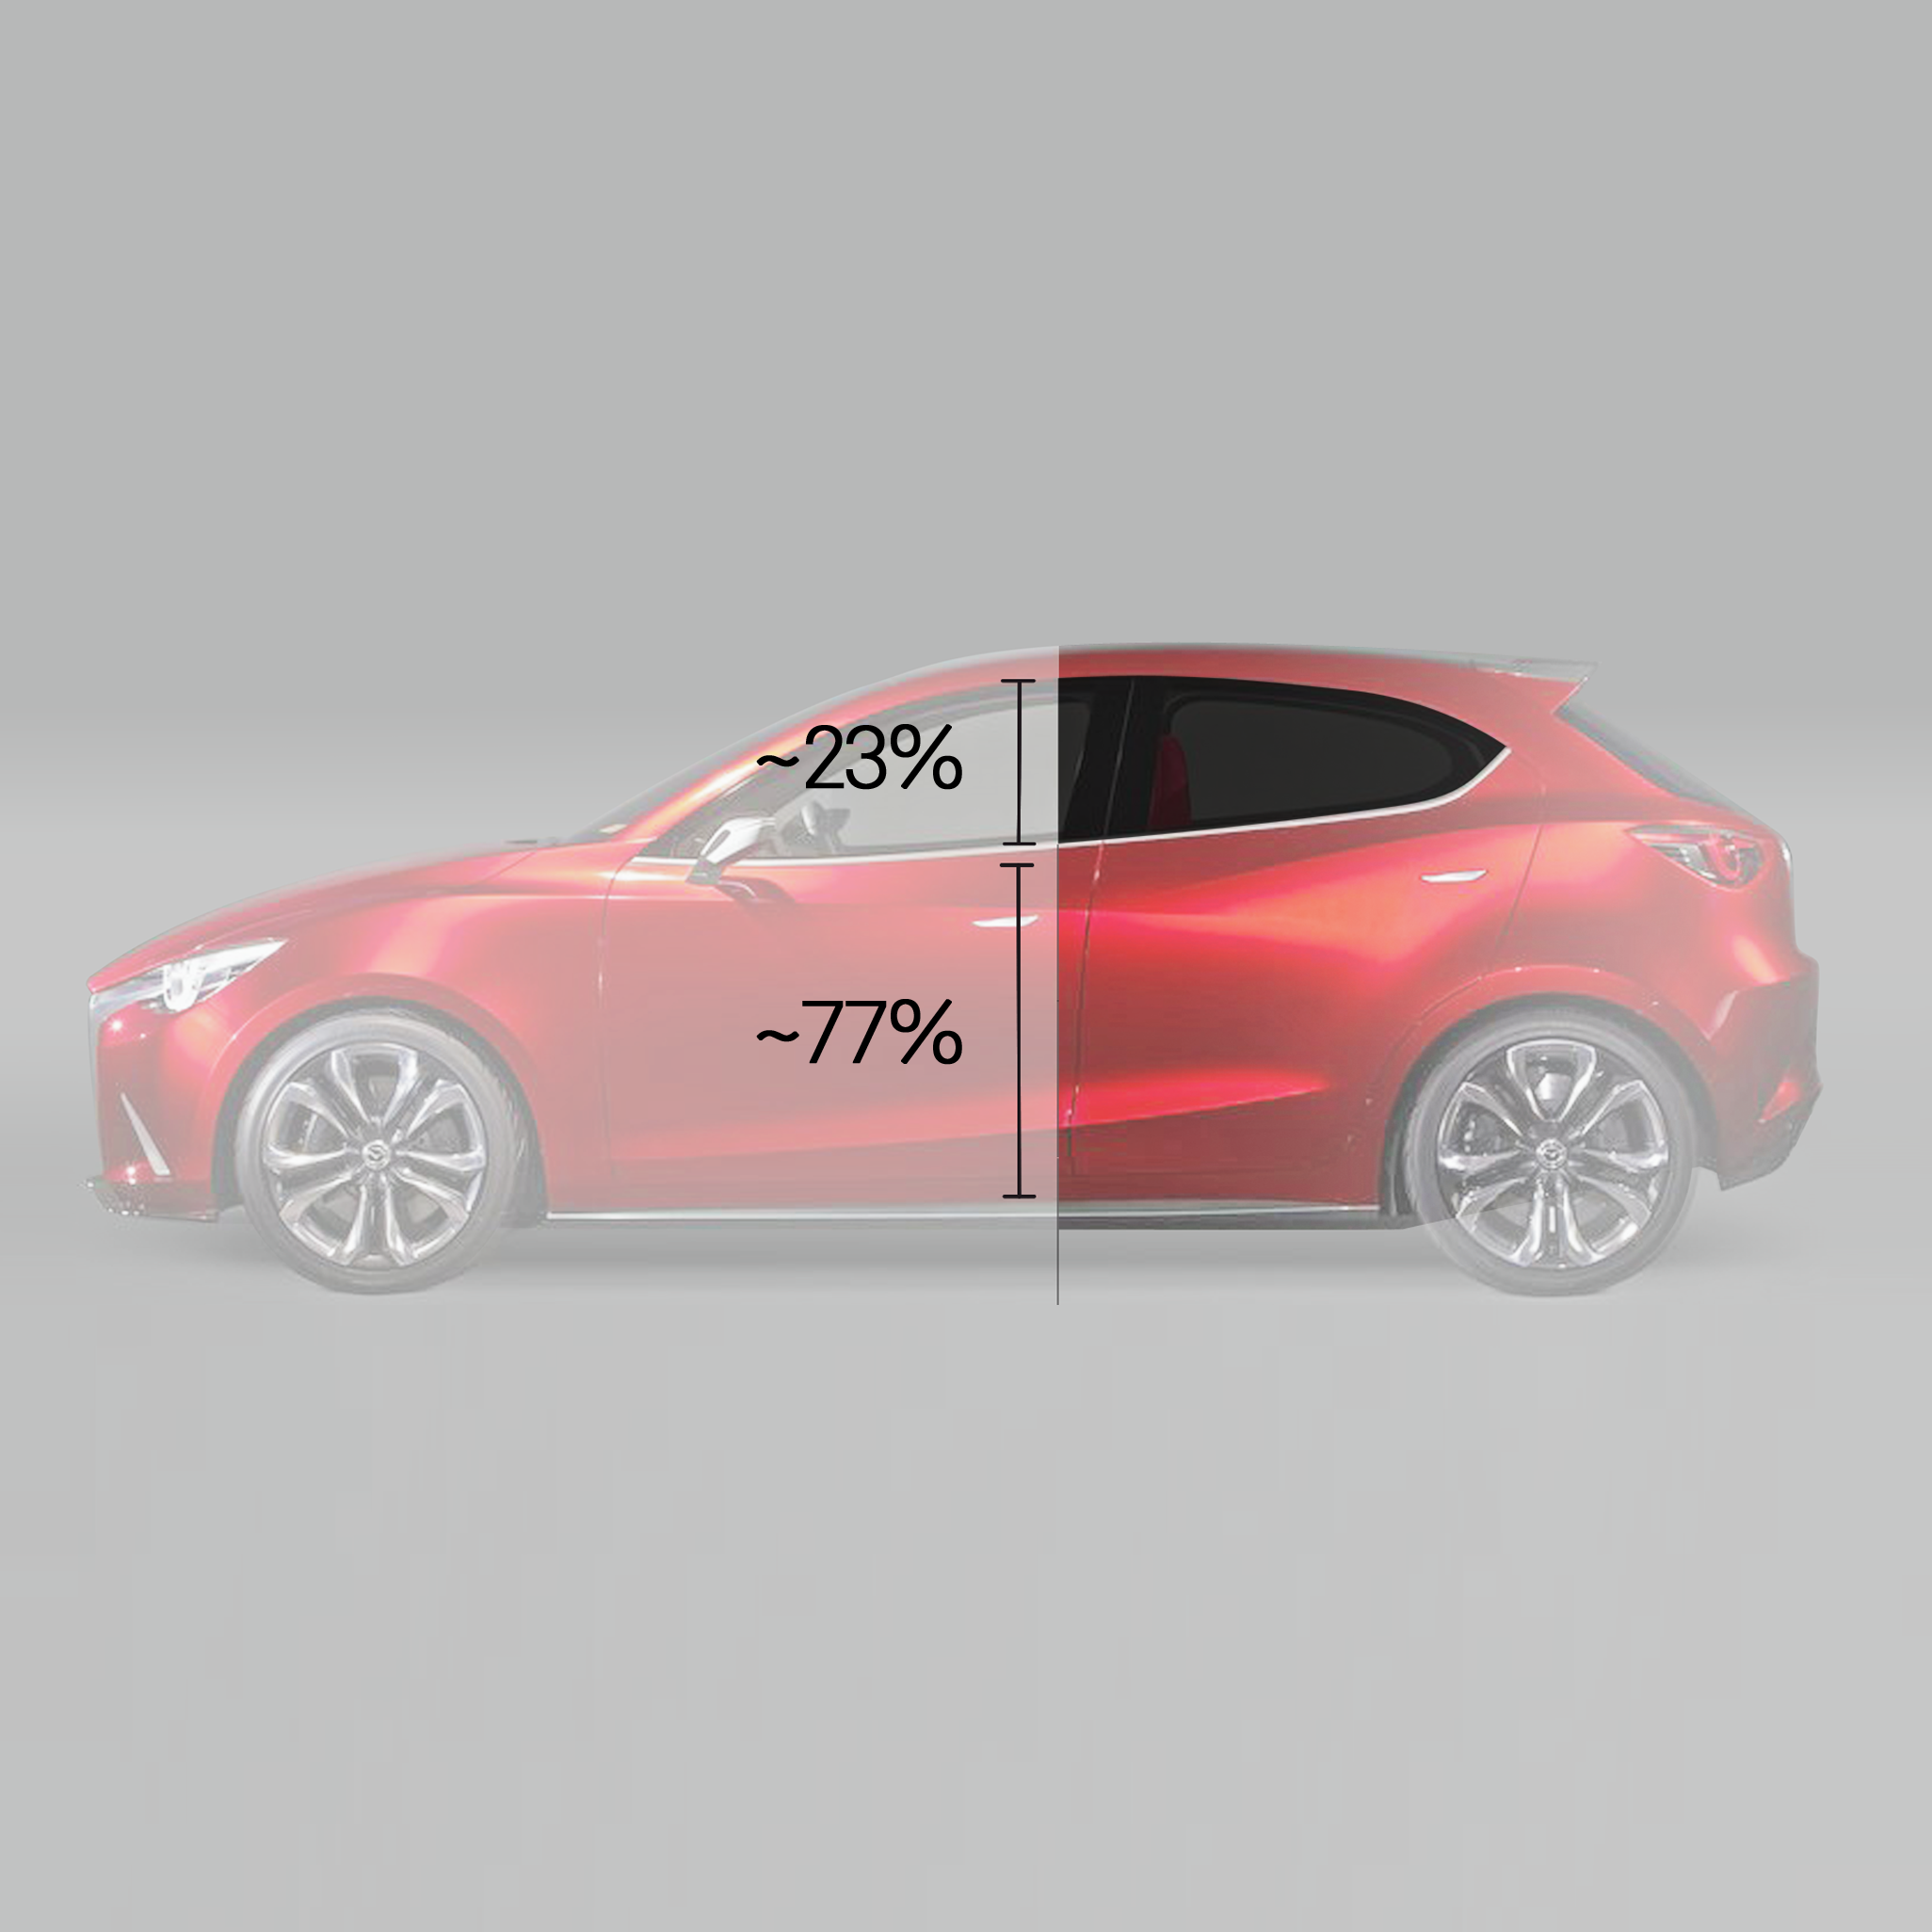
In the next step, try to get a sense of the cabin-to-body ratio. This knowledge is extremely important as most cars are roughly made out of two boxes, which are the cabin and body. You should know in what ratio the upper box (cabin) is set on the lower box (body). You will never go wrong assuming a 1/3 to 2/3 ratio. Whether you are drawing a side view or a perspective view, you should pay attention to it.
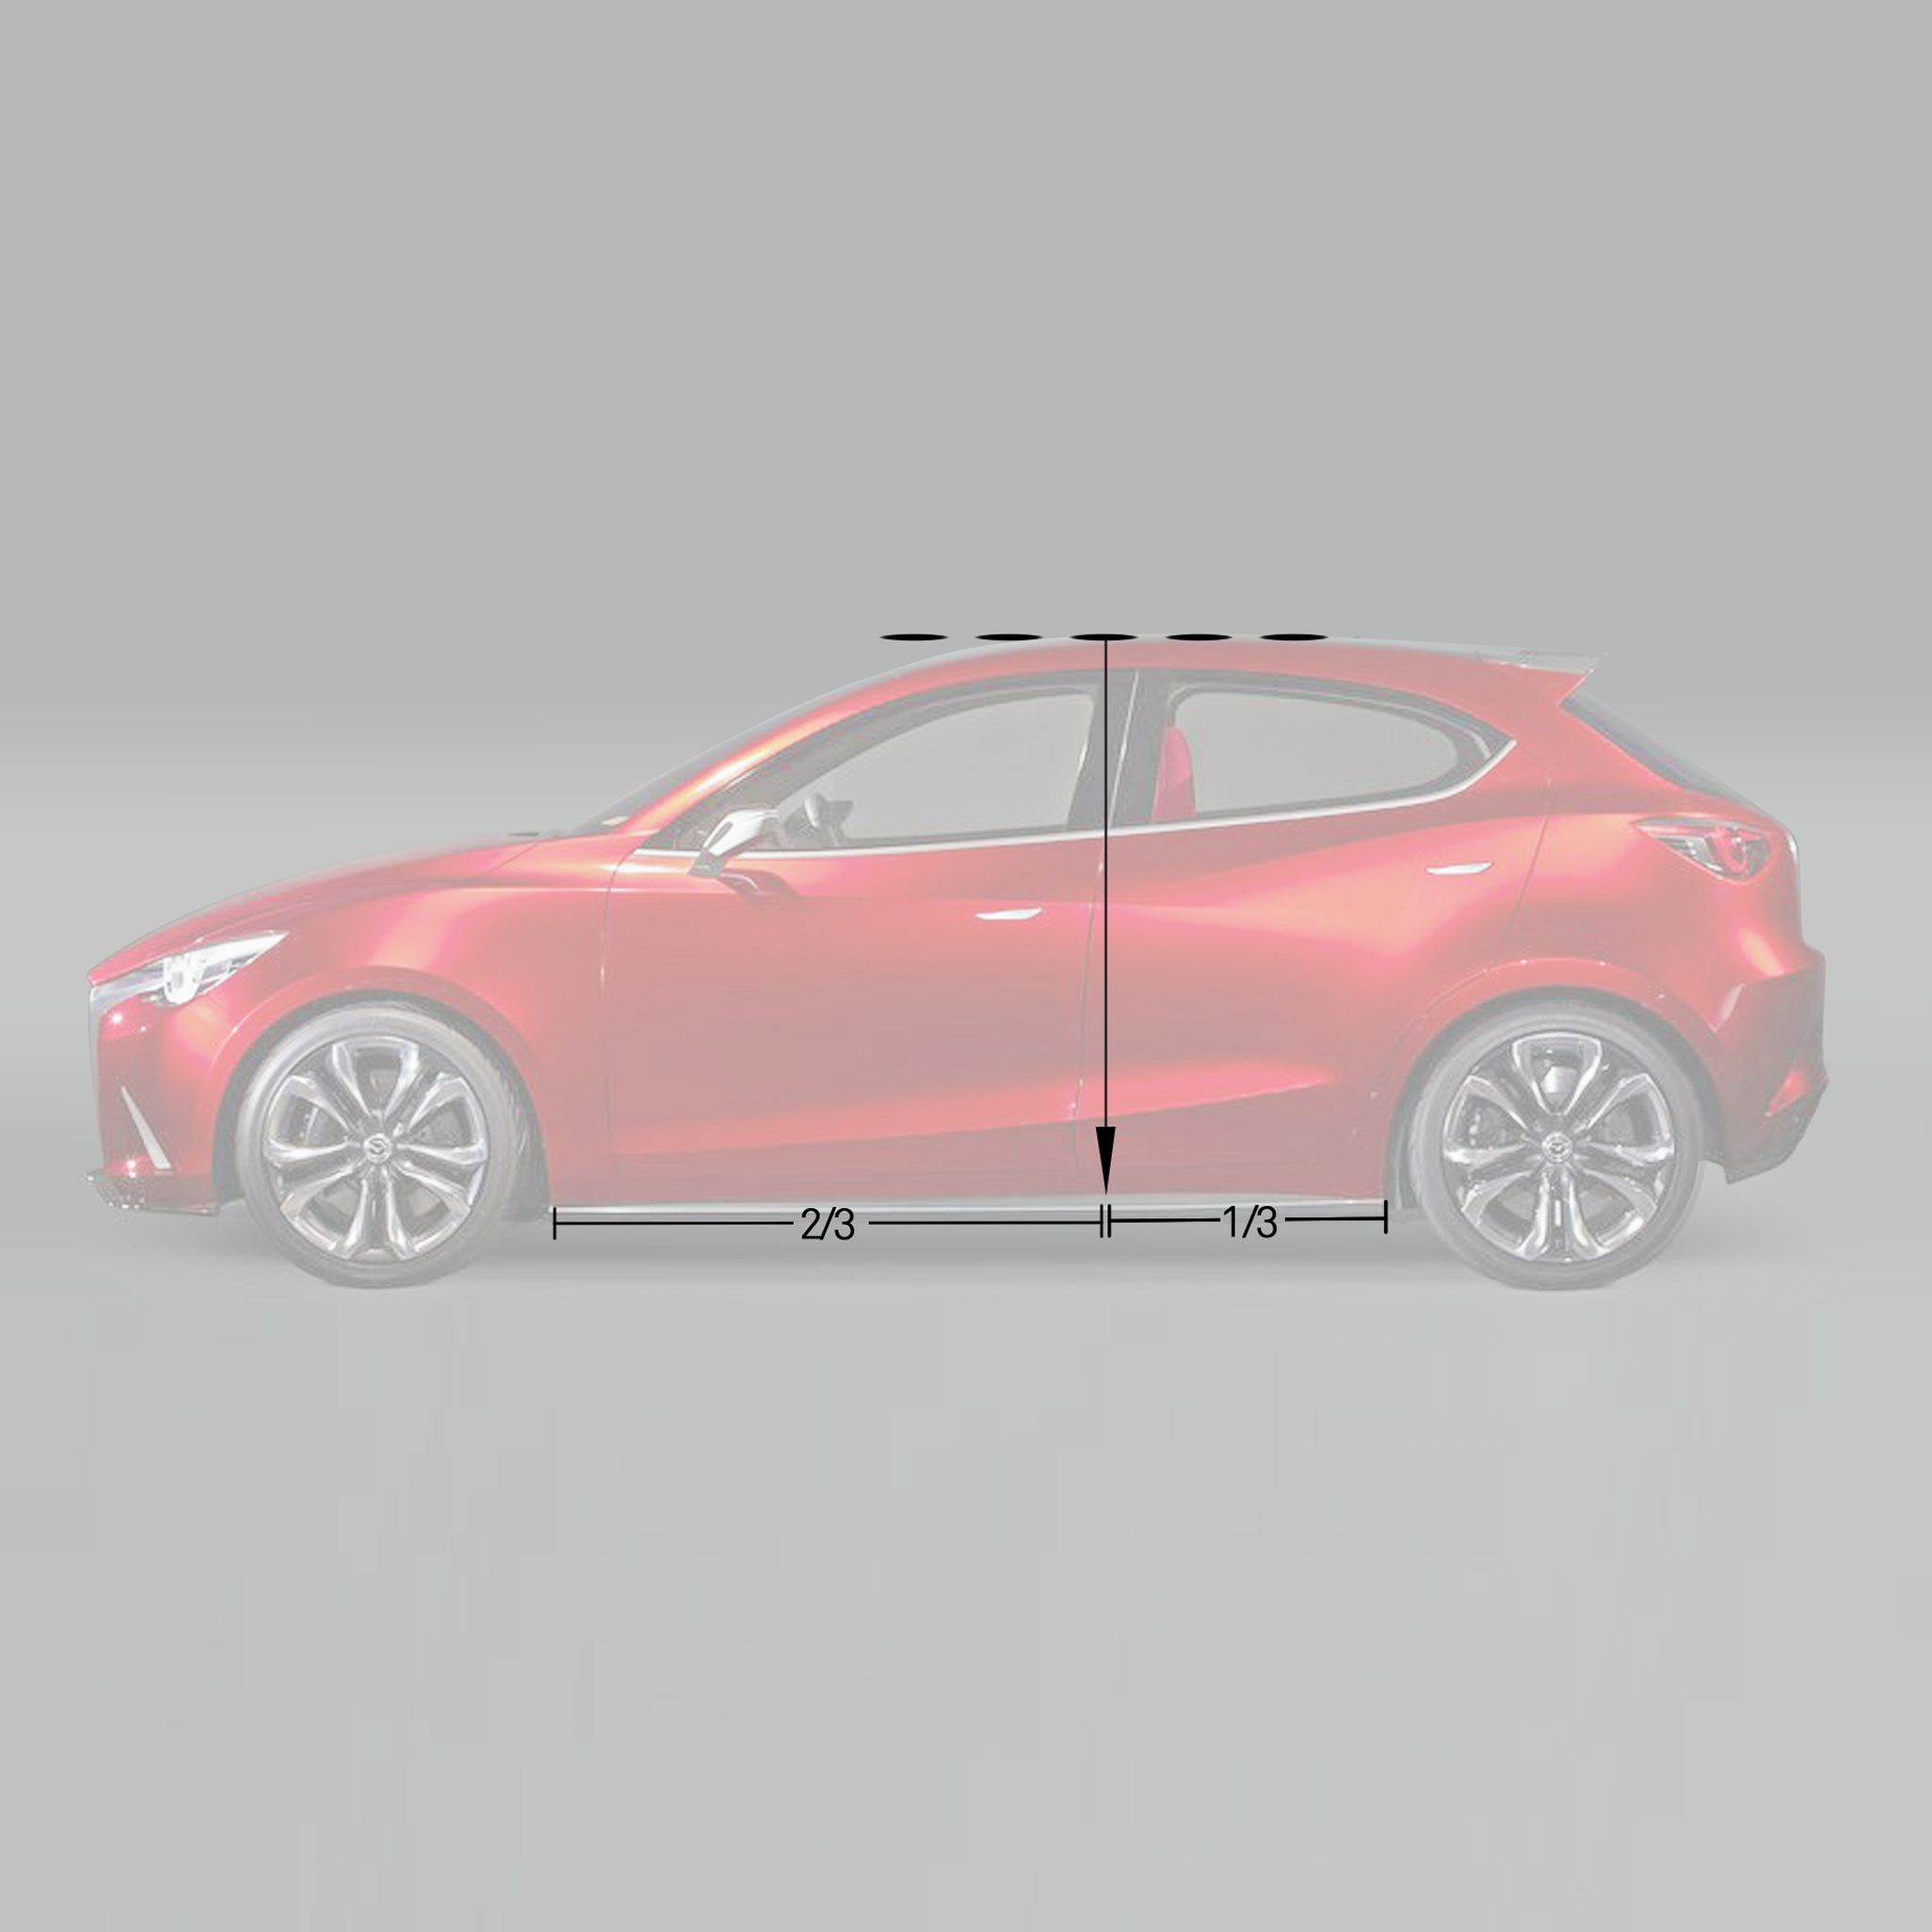
The roofline of a car is usually not straight but follows a dynamic curve. The head of the occupants usually determines the peak of the curve. To find the location of the roofline, it helps to draw a straight line down and see in what proportion the line intersects the ground line.
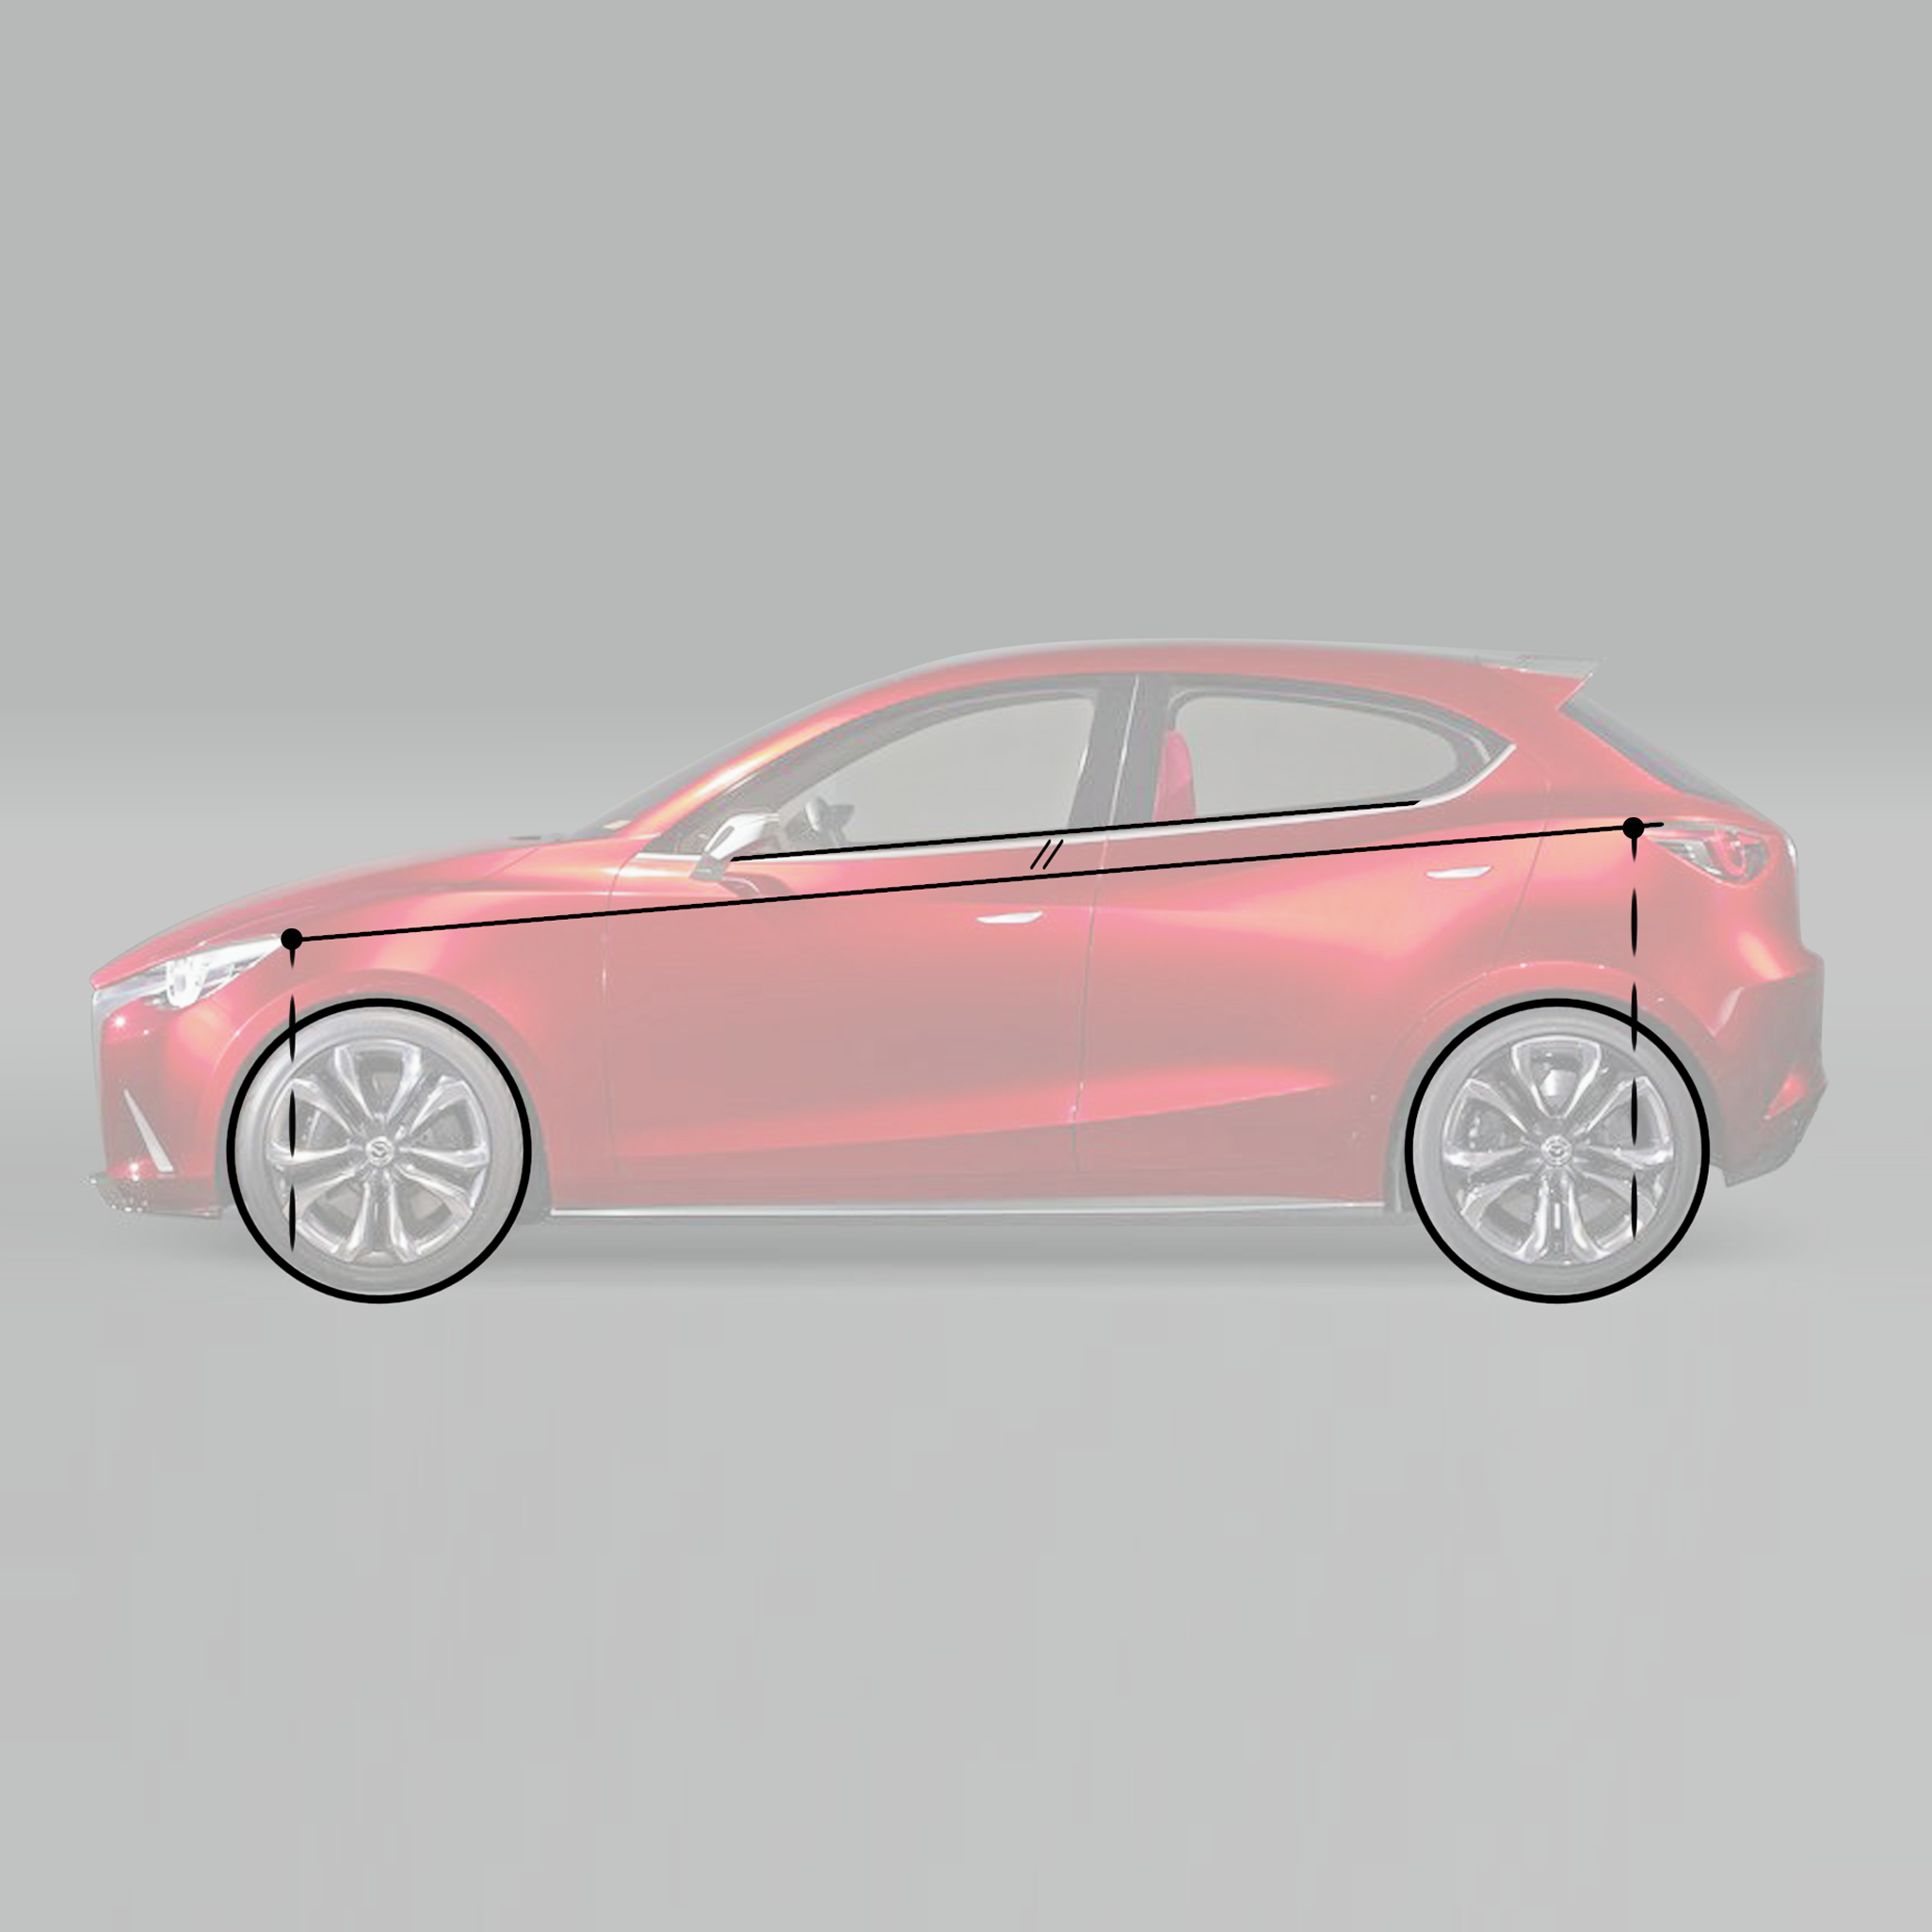
Next, look at the shoulder. You will notice that almost every automobile has a certain angle. This gives the whole car a forward motion and makes it look dynamic even when it is not moving. You can emphasize this angle sometimes more and sometimes less.
Now, you can also check where the front light and the rear light are positioned. If you draw a vertical line from the beginning of the light downwards, you’ll see that it overlaps the front and rear wheel.
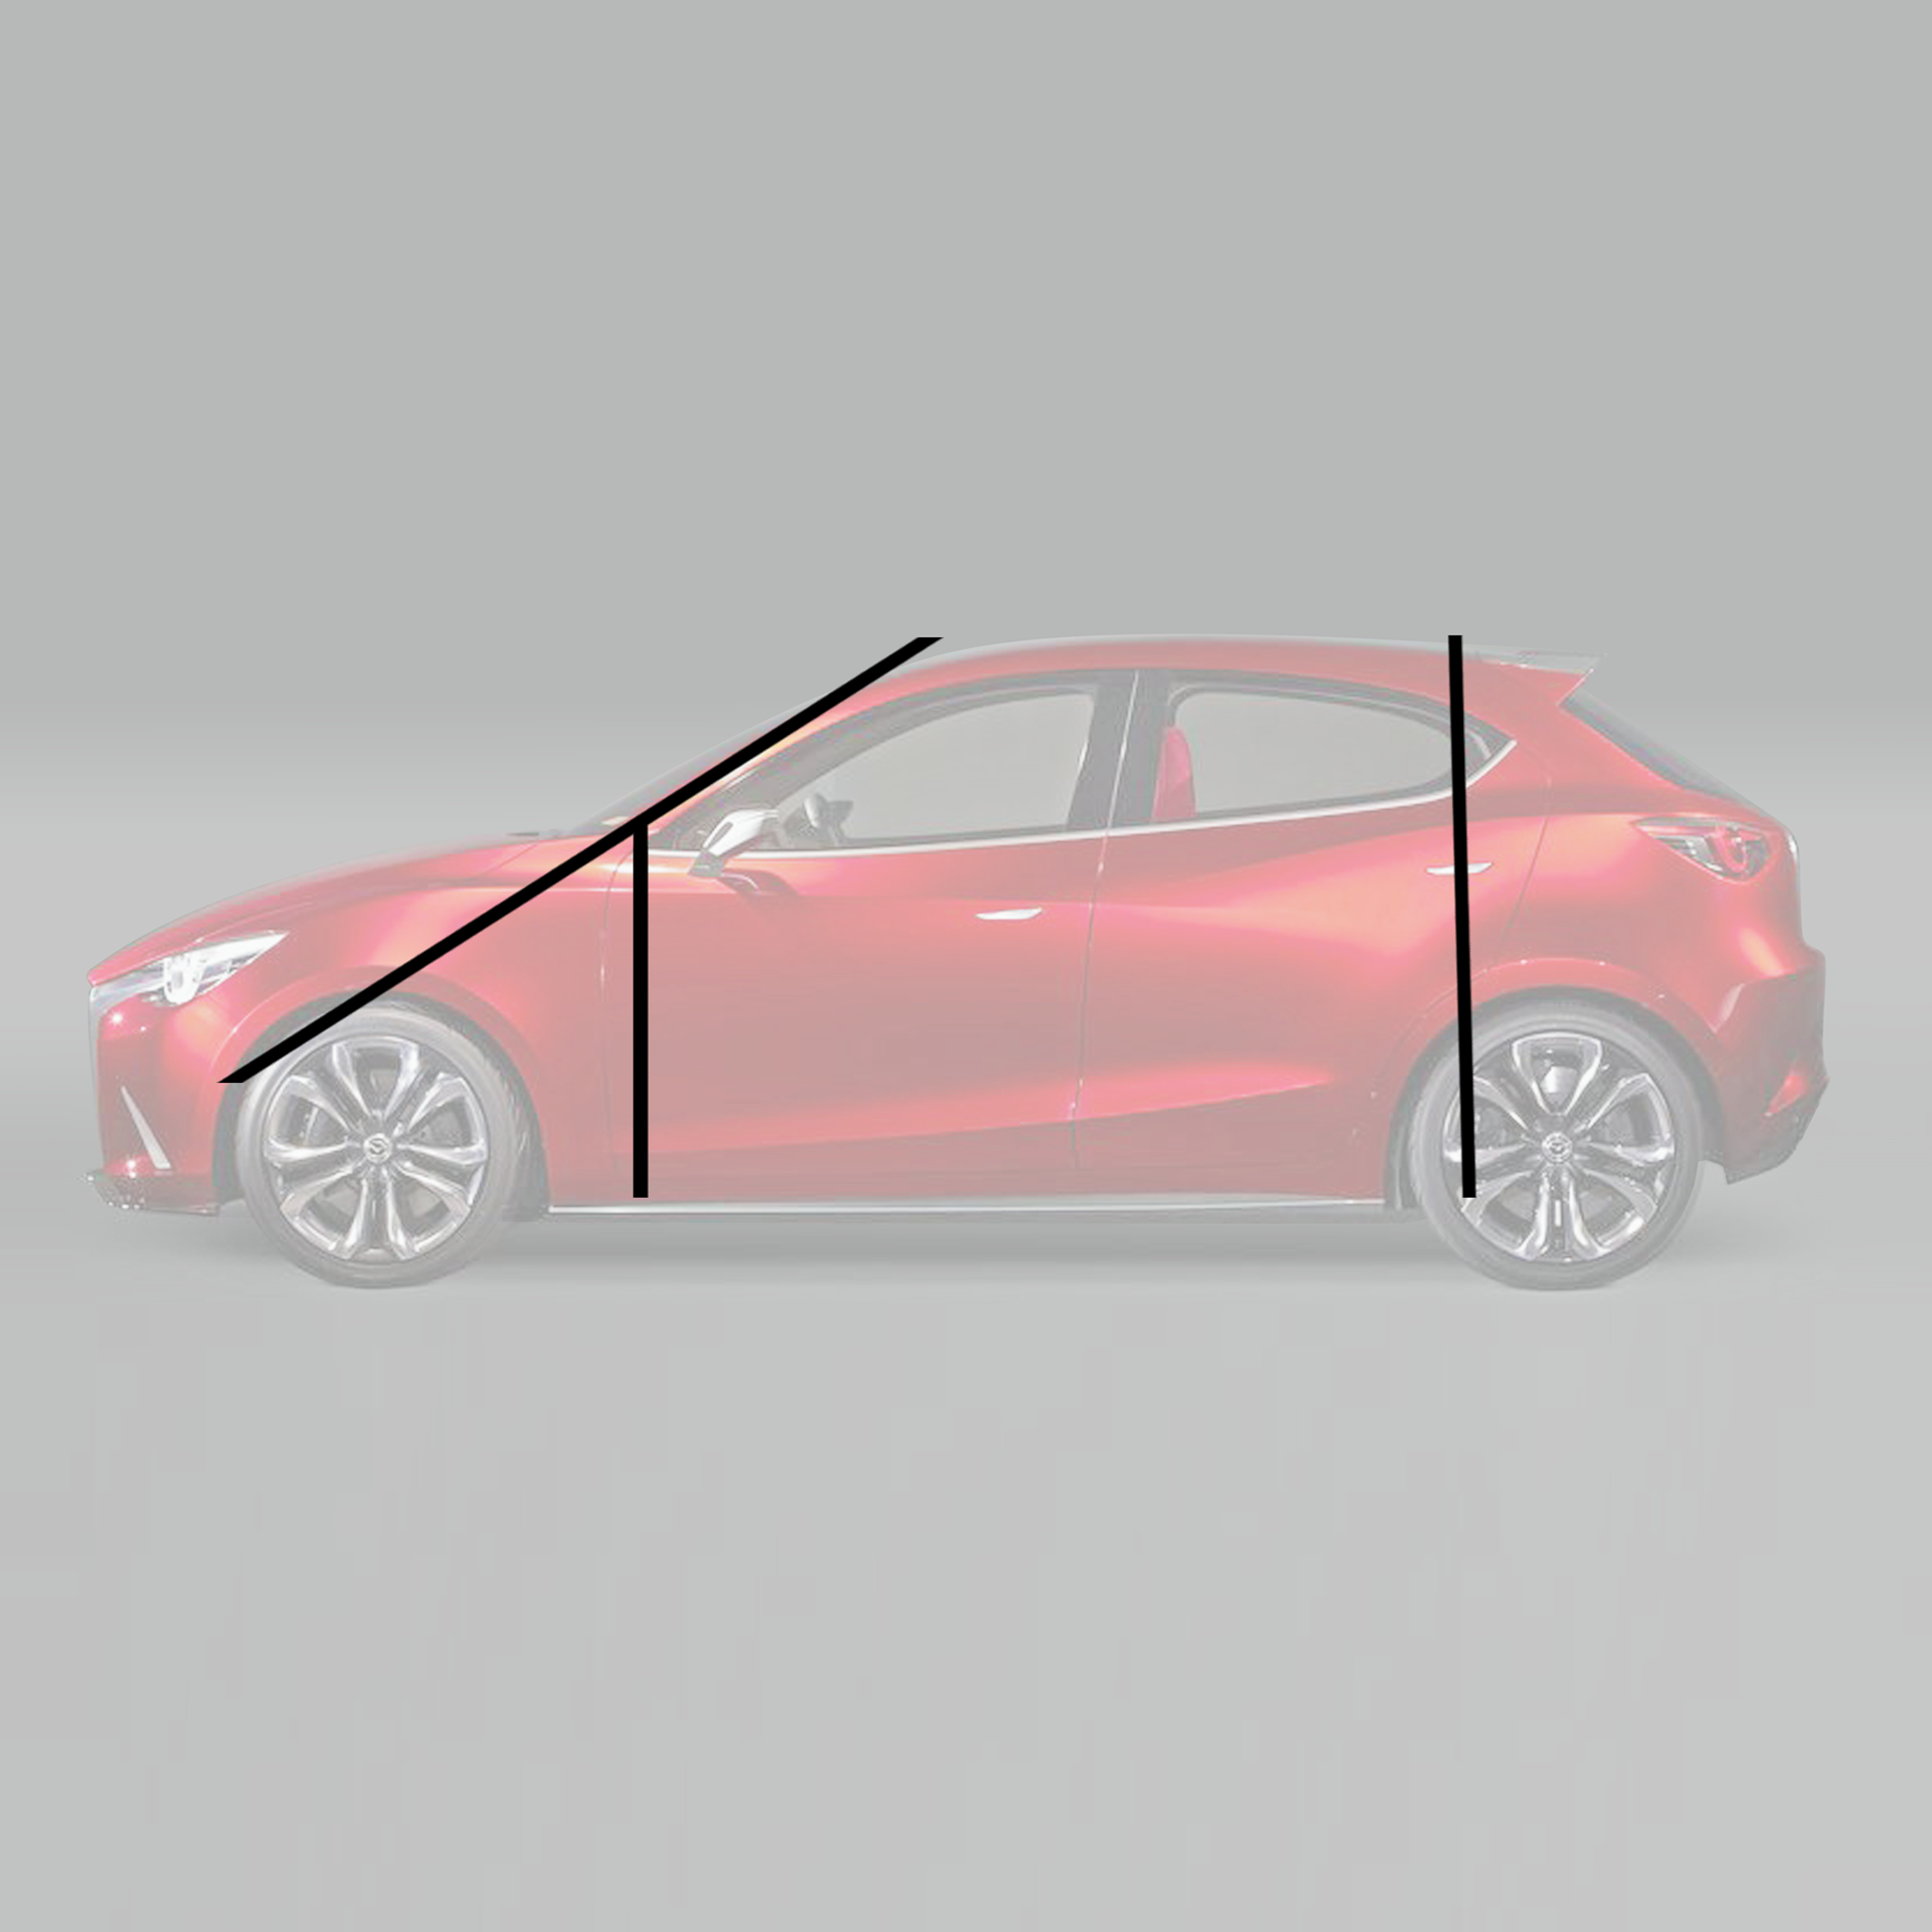
Another important point is the position of the A-pillar. It gives you information about the angle of the windshield. If you extend the A-pillar, you see that it is tangent to the front wheel. The door joint is usually located where the A-pillar begins. In this case, slightly offset behind the front wheel.
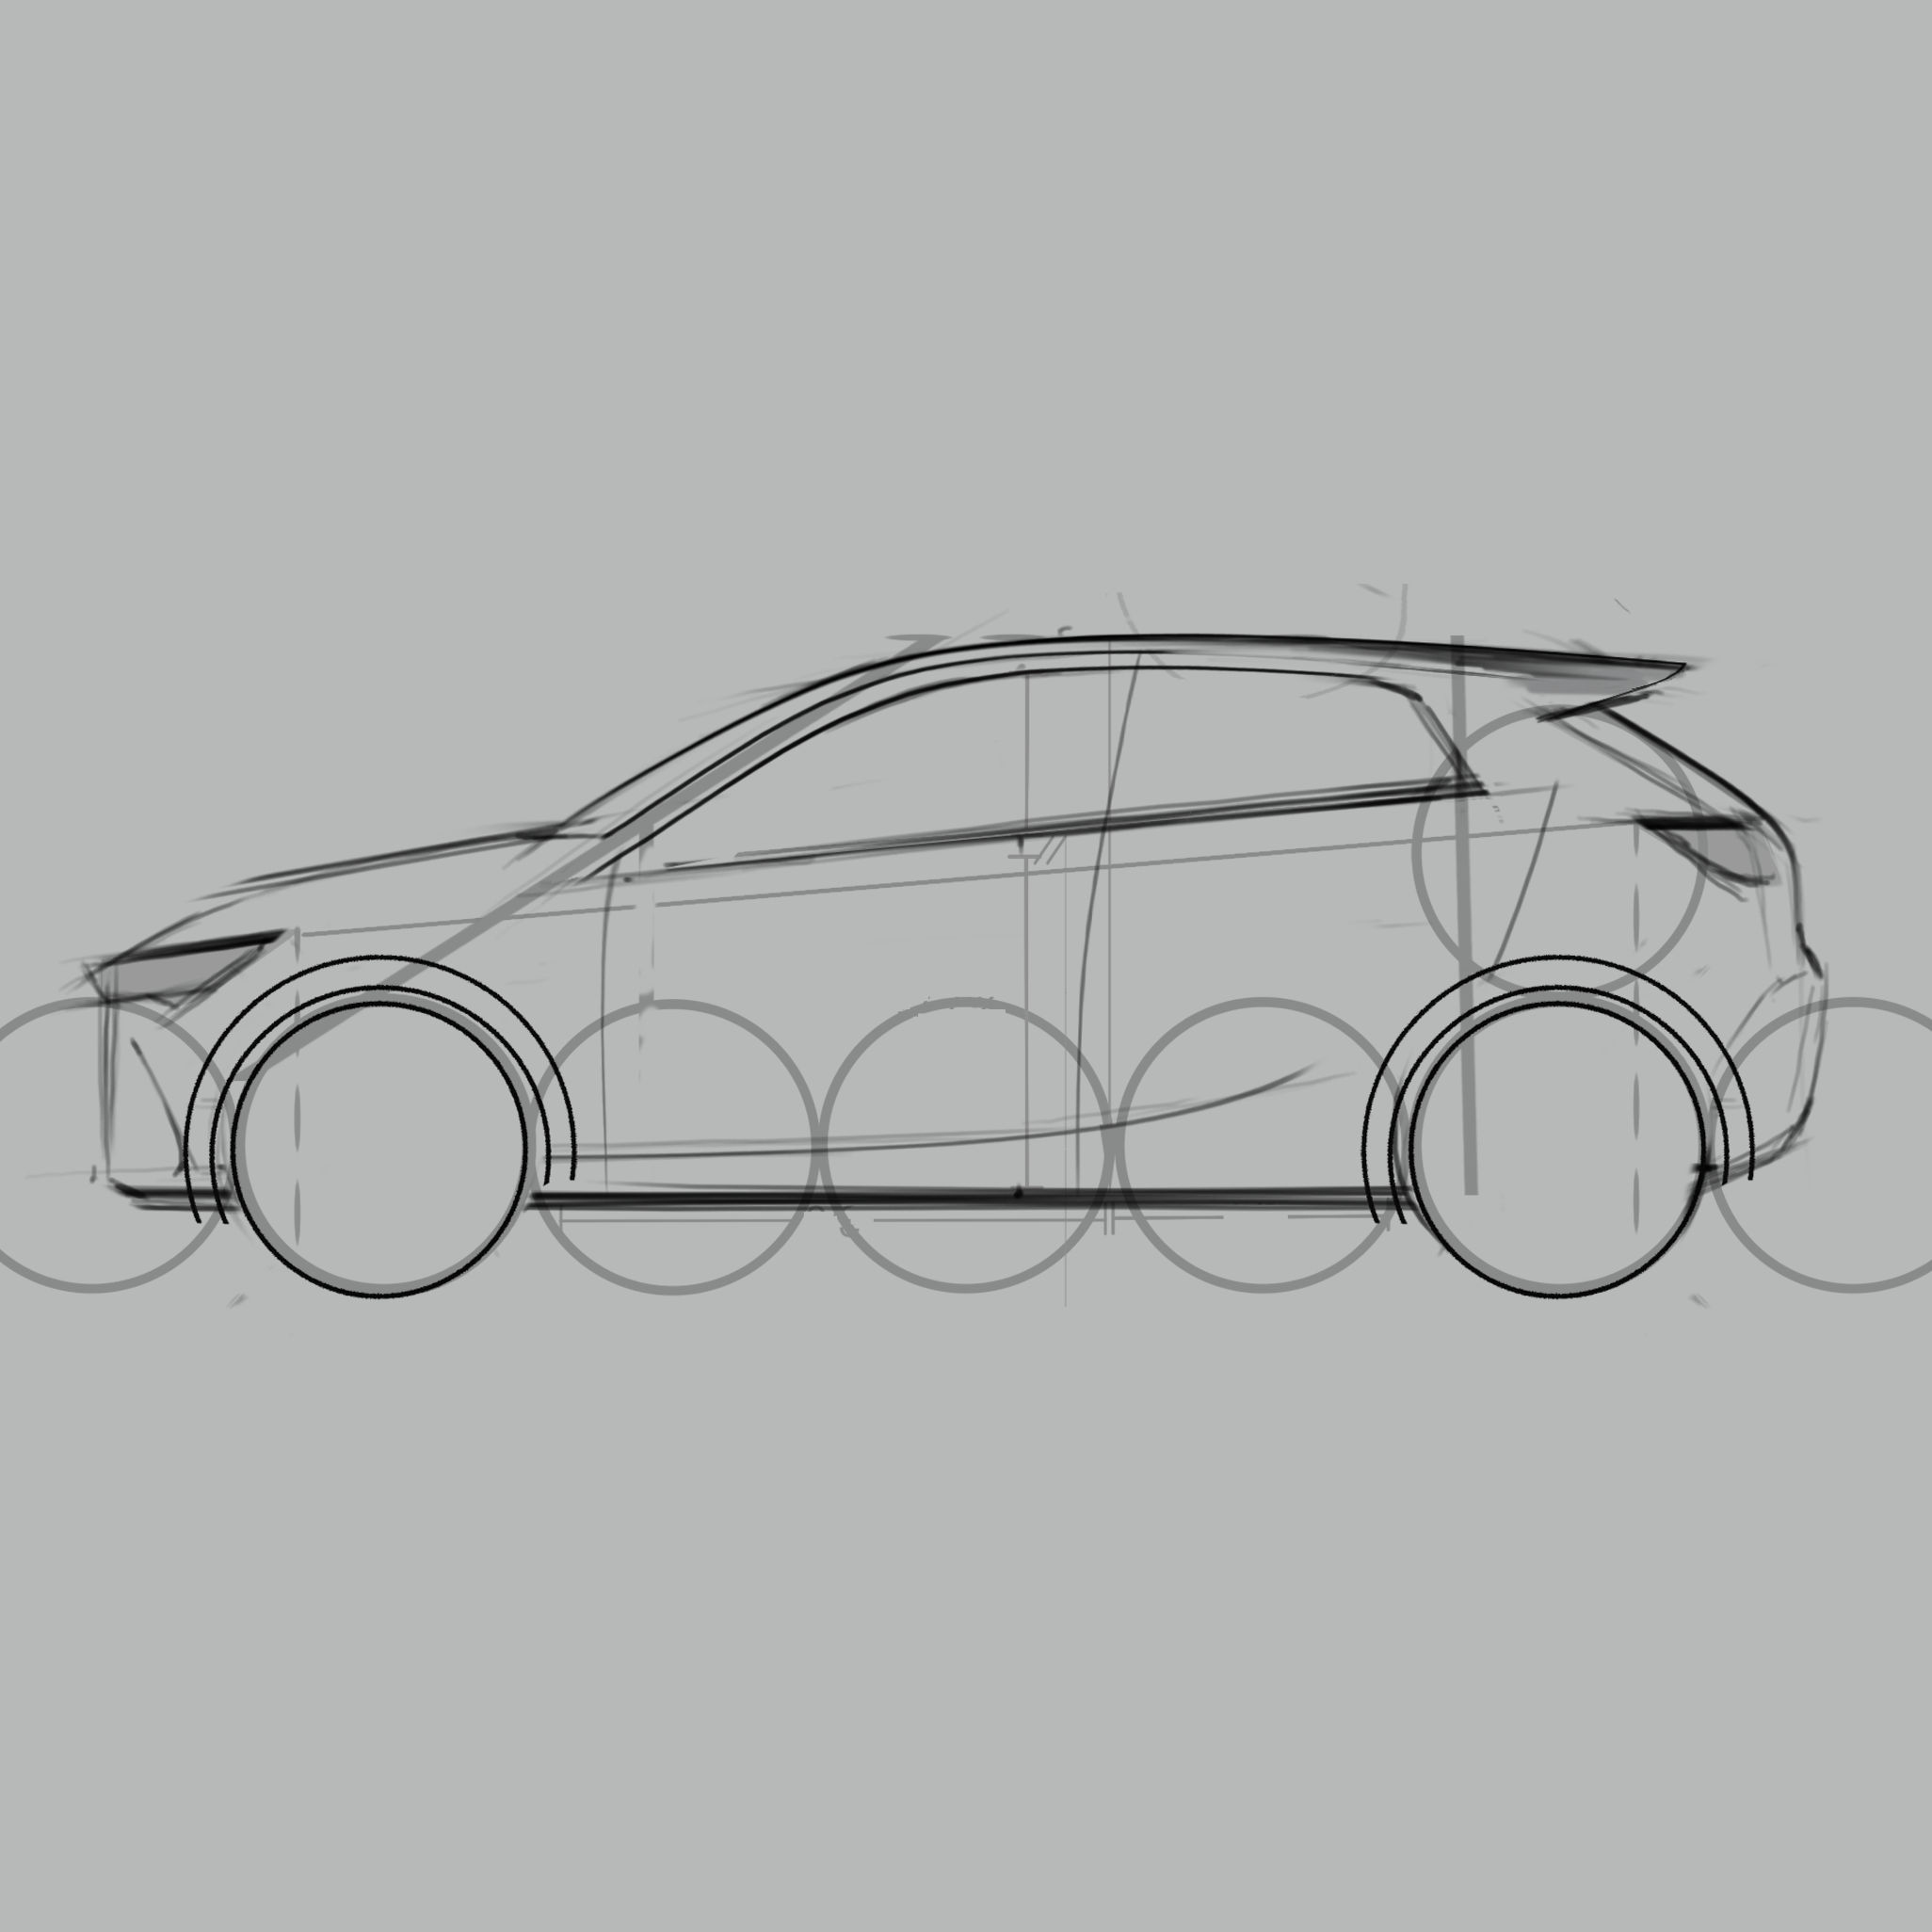
After completing the steps above, you’ll have an approximate skeleton of the car. When drawing your design on this skeleton, you will always hit the right proportions.
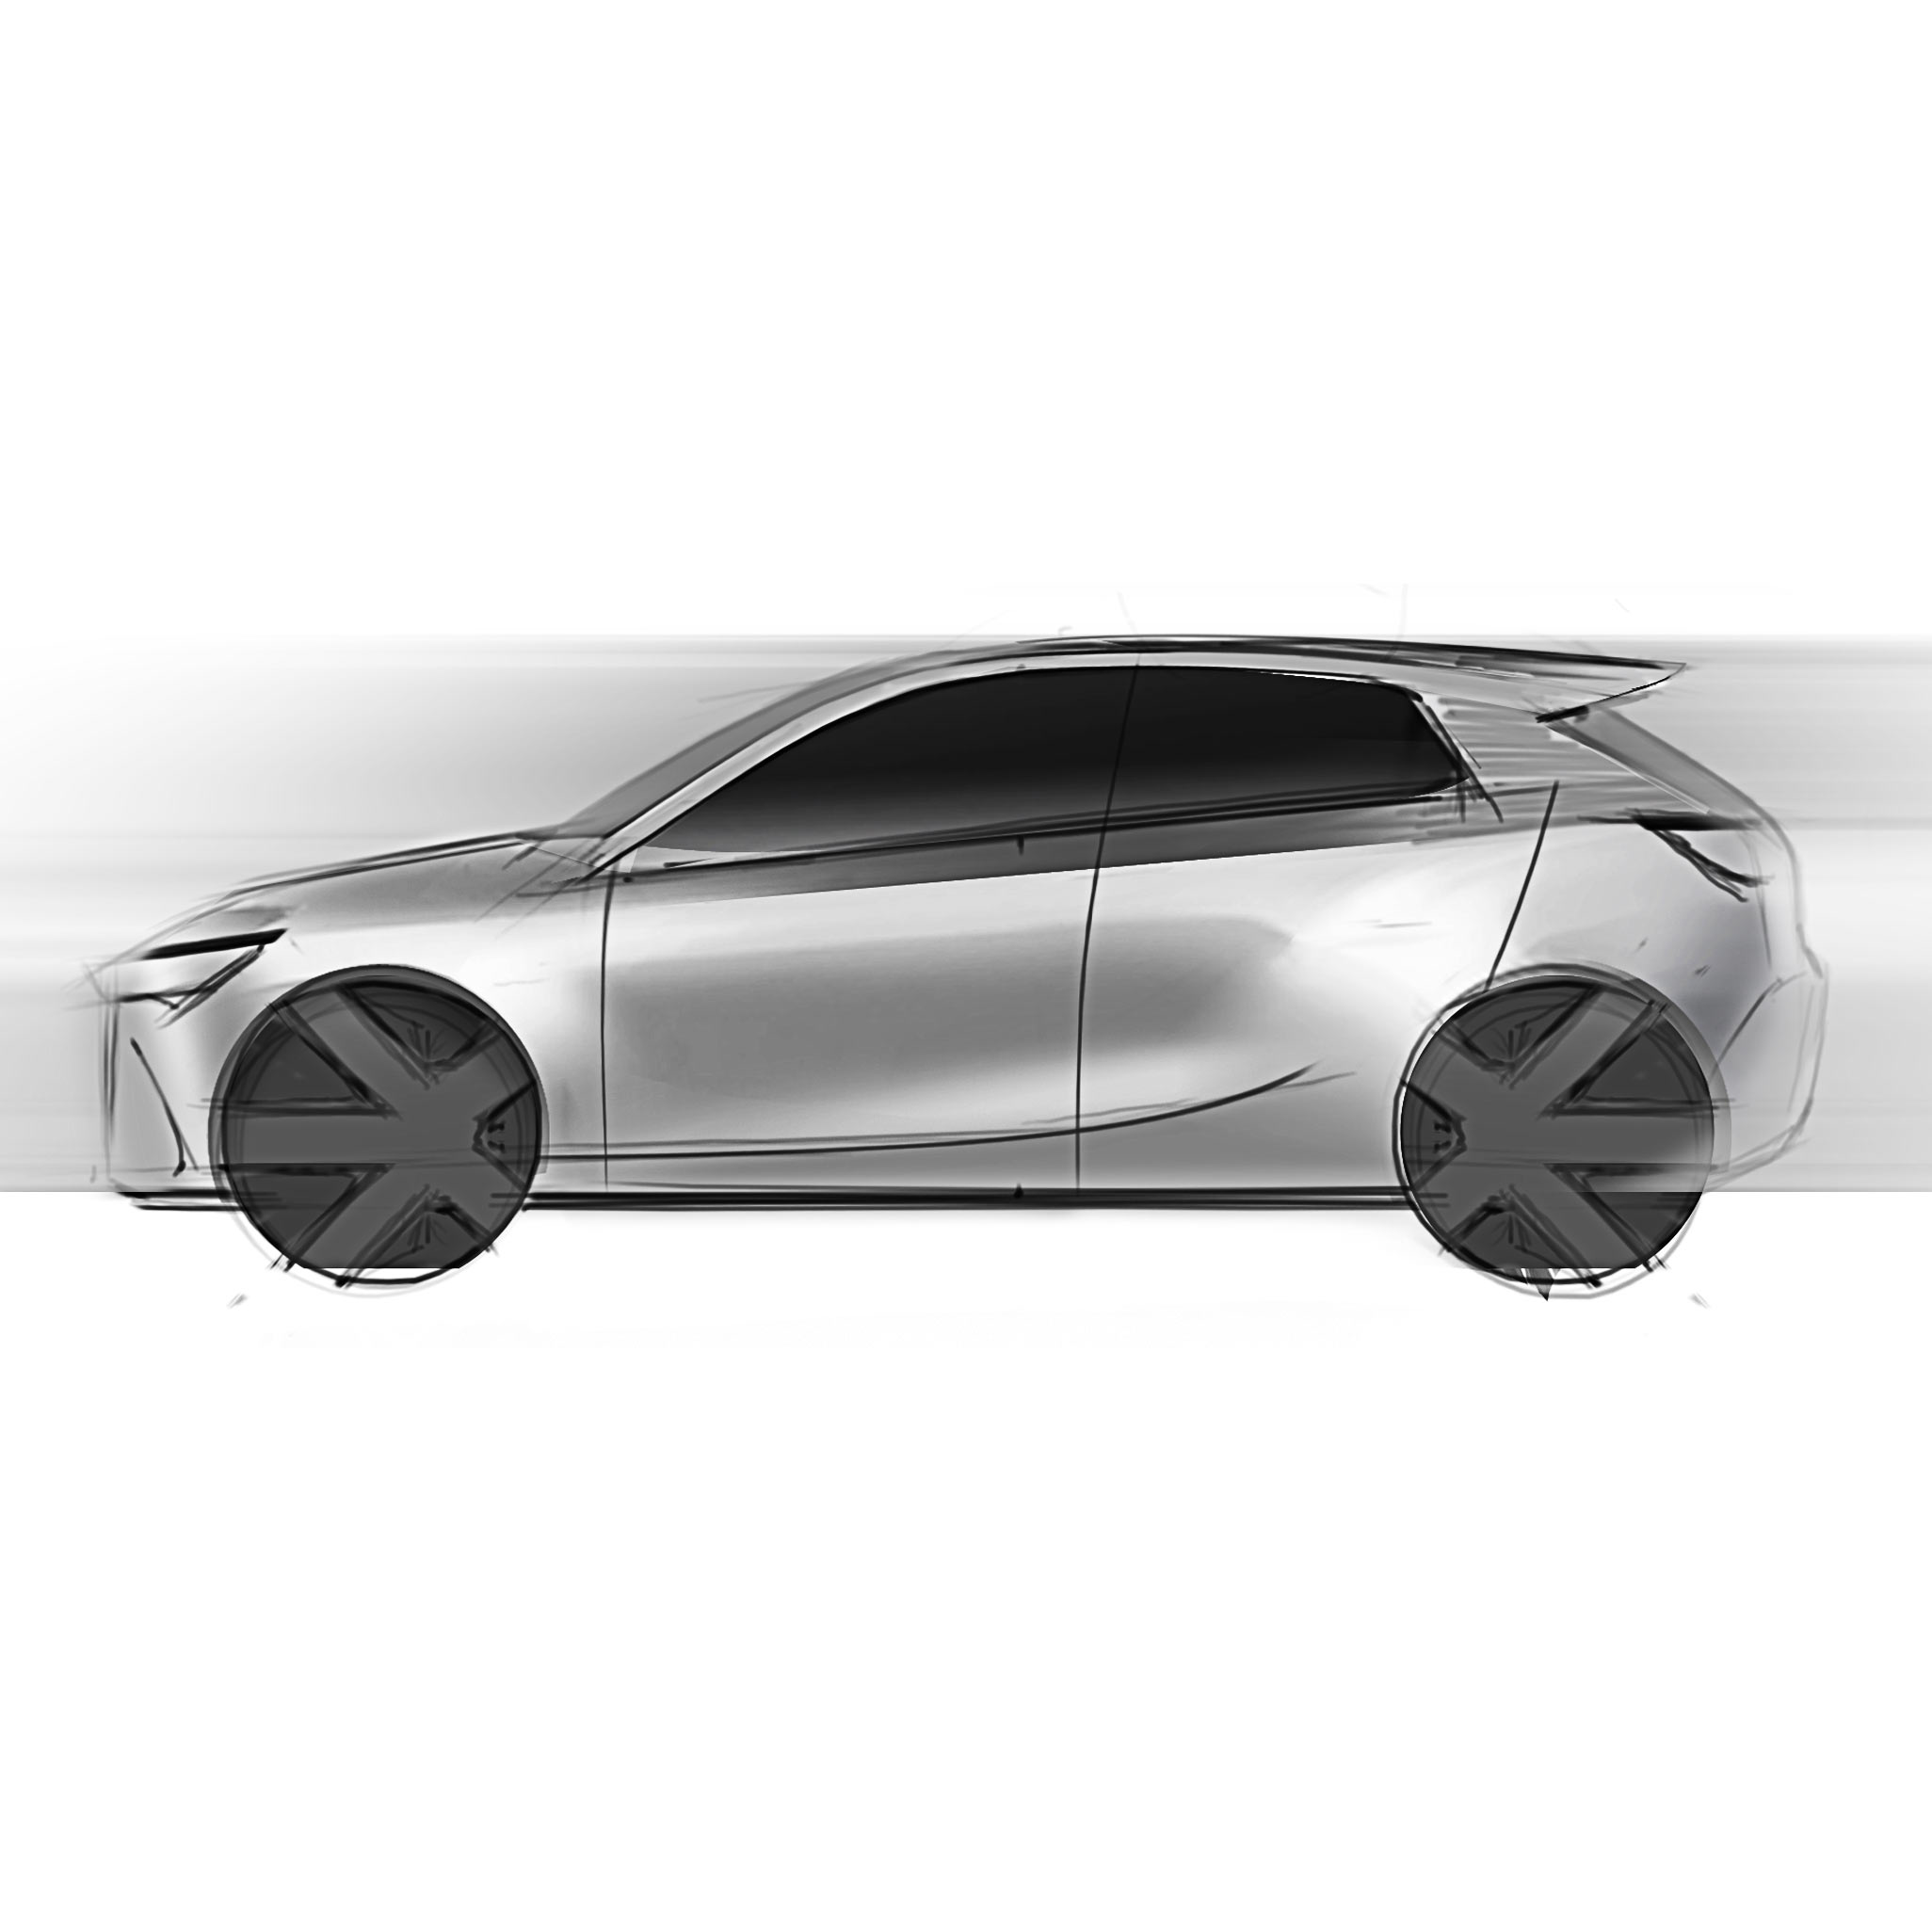
Now, you have all the information needed to start drawing your own car. If you follow this tutorial, you can be sure to meet the basic package and technical requirements of designing a vehicle with the right proportions. This will make your sketch look convincing and realistic.

More Stories
2026 Kia EV6 Pricing: The EV That Just Got $5,900 Cheaper and Is Still Selling at Sticker
If you are shopping for a 2026 Kia EV6 and want to know what dealers are actually charging, what a...
2027 Genesis GV80 Pricing: What to Expect on a Carryover Model With a Modest Price Increase
The 2027 Genesis GV80 is confirmed on Genesis’s own official Build and Price configurator at a starting MSRP of $58,850,...
2026 Audi Q3 Pricing: What Real Buyers Are Paying on Audi’s All-New Single-Trim Subcompact Luxury SUV
The 2026 Audi Q3 is genuinely all-new, and it arrives with a buying structure unlike anything else covered in this...
2027 Genesis GV60 Magma Priced at $69,950 as Brand’s First High-Performance EV
Genesis has officially put a price on its first true high-performance model, and the 2027 GV Magma will start at $69,950...
2028 Mercedes-Benz GLA Goes Electric First With Hybrid Models to Follow
Mercedes-Benz is taking its entry-level SUV into a new era with the redesigned 2028 GLA, and the biggest change is...
2026 Mercedes-Benz GLS Pricing: What Real Buyers Are Paying on the Three-Row Flagship That Floats Over Bad Pavement
The Mercedes-Benz GLS is the full-size, three-row expression of the GLE, and TrueCar’s description of it is the most precise...